
🎃🧙♀️ Get ready to cast a spell on snack time with these Halloween pretzels! Made with just three ingredients, you’ll have a treat that will leave your guest shouting, “Hocus Pocus, more, please!” These witch fingers pretzels are “the proof in the pudding” that deliciousness doesn’t have to be complicated whether you are prepping for a spooky movie night or looking for a fun snack to share with friends. So grab your broomsticks and let’s get munching! 🥨✨

Jump to:
This post may contain affiliate links, please read the disclaimer policy.
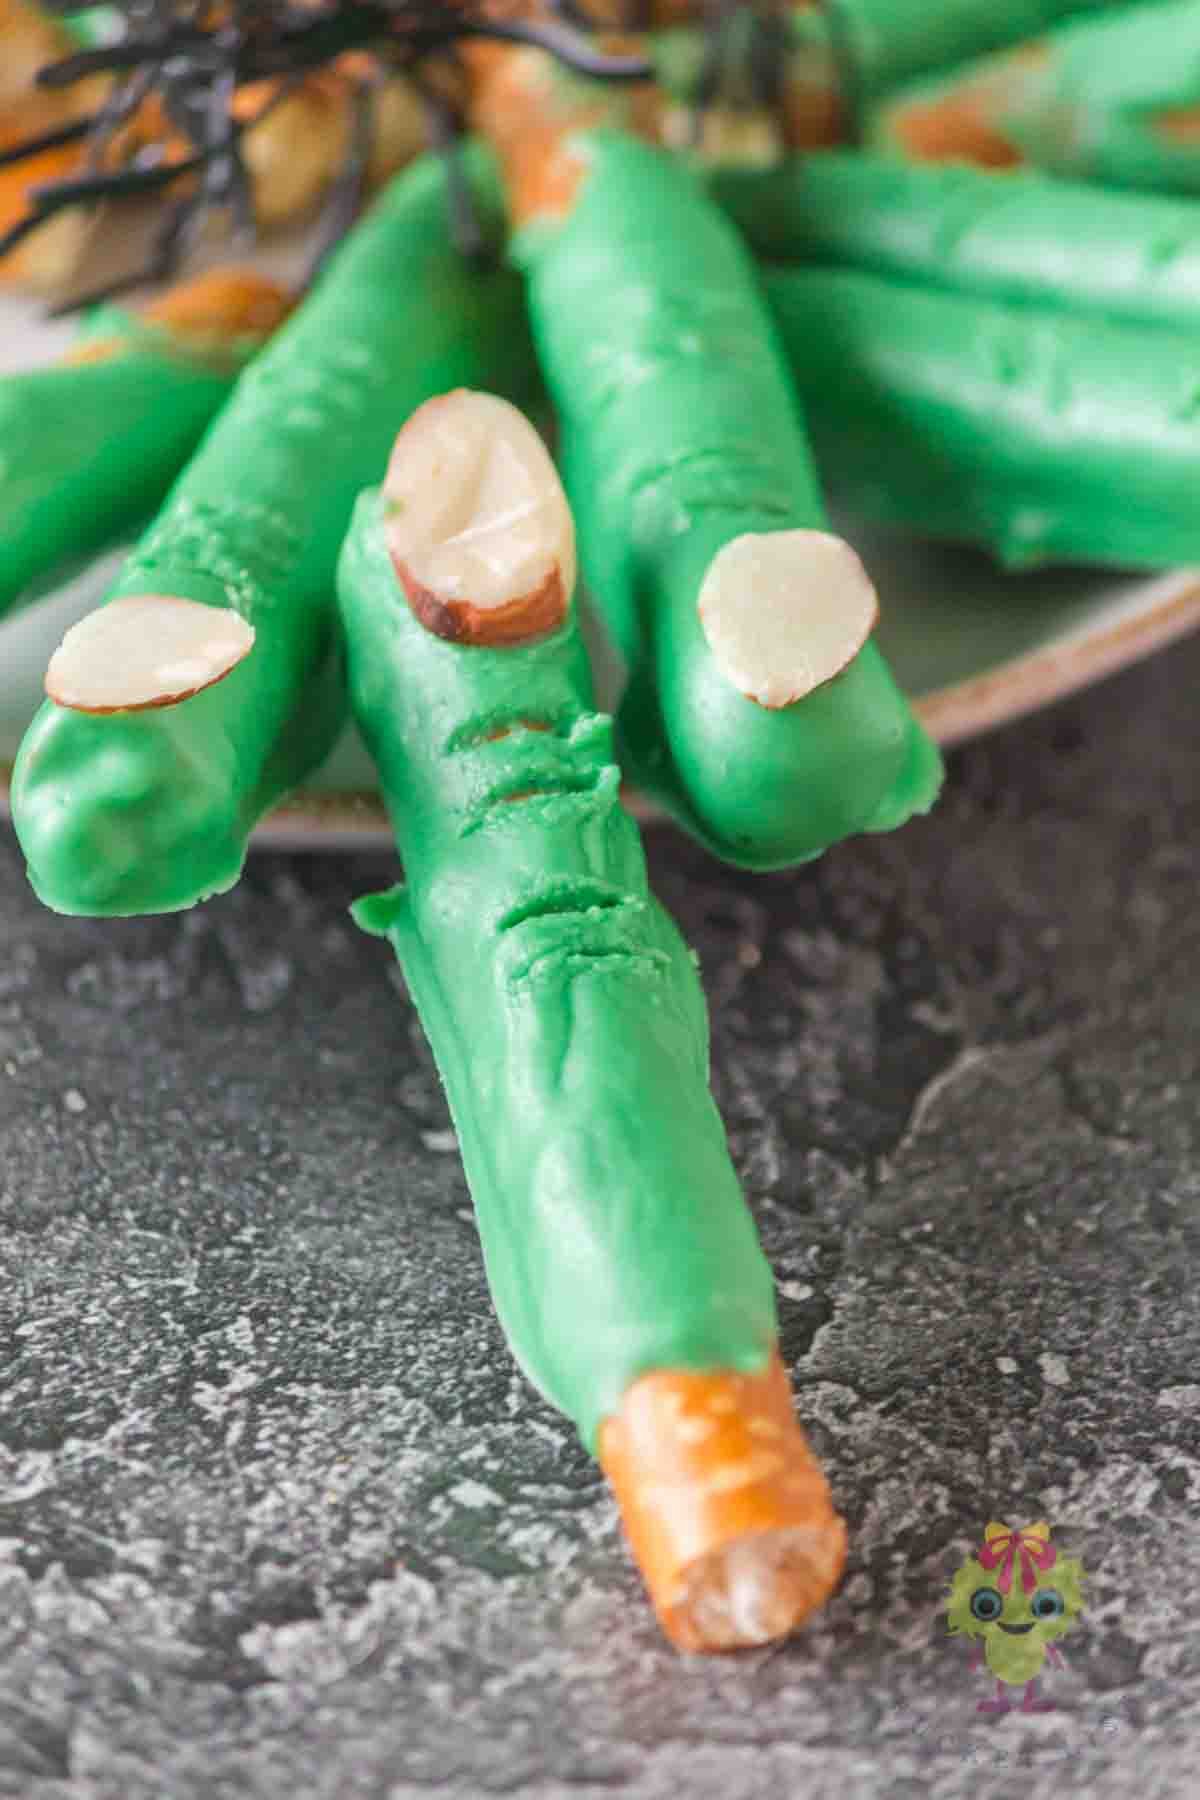
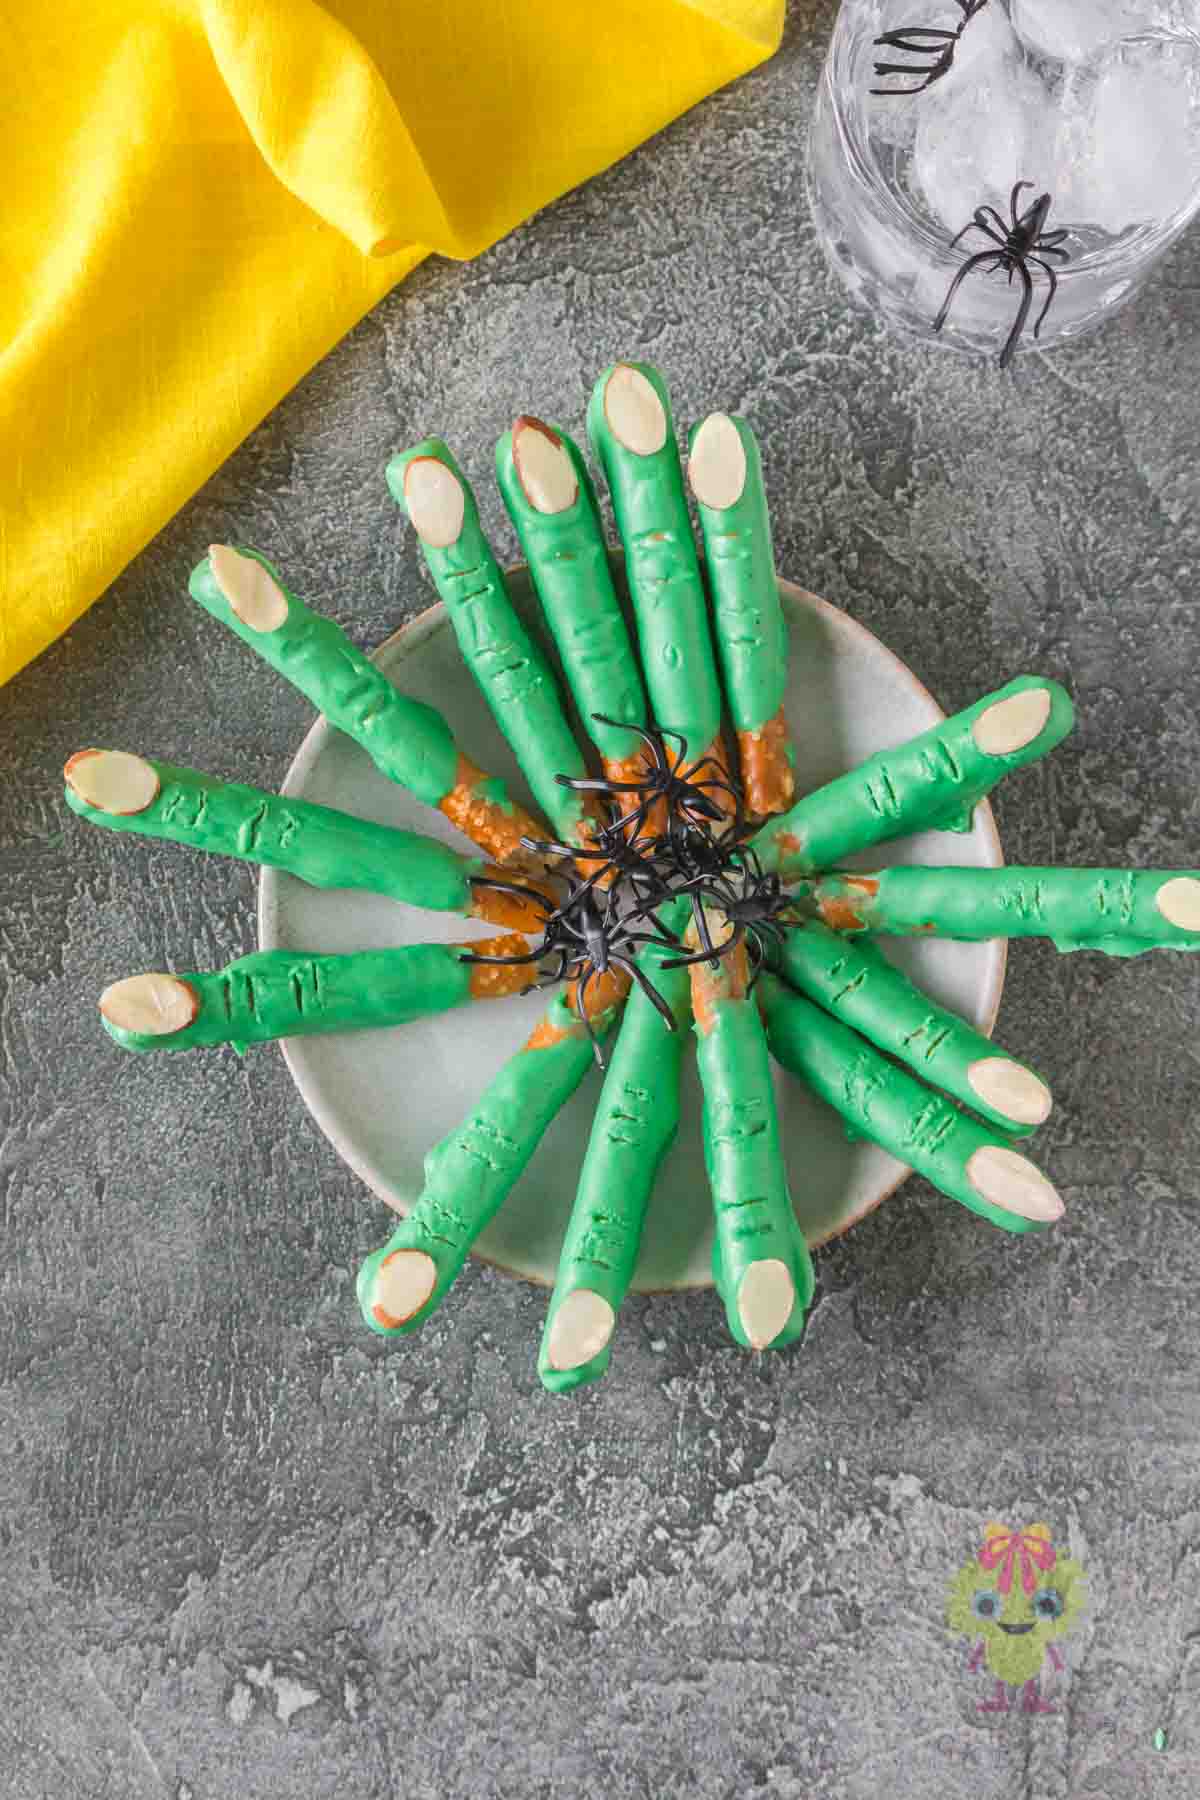
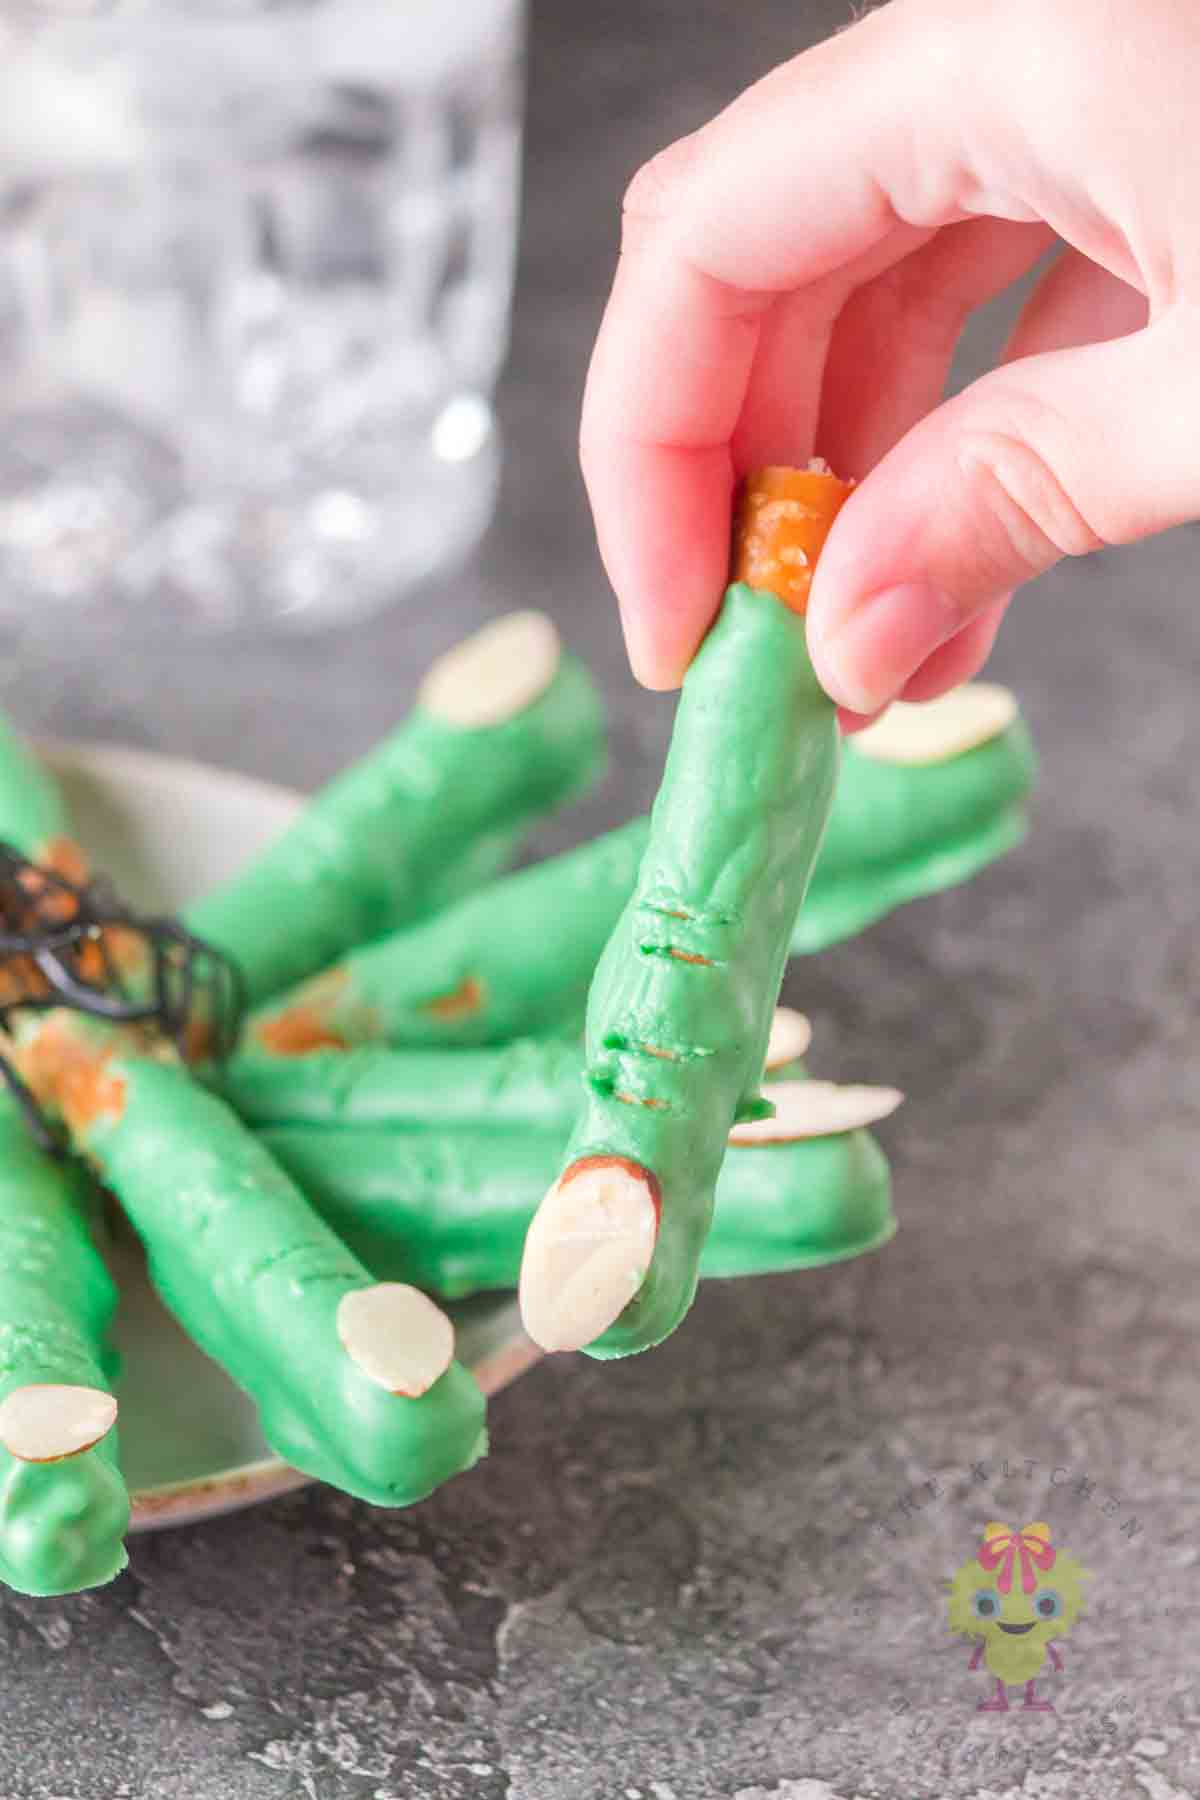
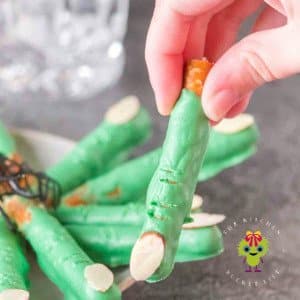
Witch Fingers Pretzels
We had fun decorating Halloween pretzels this year. The witch fingers pretzels were the best because it is just 3 ingredients. Using candy melts to coat the pretzel rods is a game-changer. Why we used the candy melts to make the witch fingers pretzels:
- They come in a wide variety of colors to match your Halloween pretzel decoration idea.
- No requirement to temper, the candy melts leave a smooth surface when melted, and it quickly sets. This makes the whole process simpler.
- They keep the mess to a minimum, are easy to melt in the microwave or bain-marie, and everyone can use them no matter their experience in the kitchen.
More Halloween treats
We are excited to share even more fun, creative, and tasty Halloween treats like Halloween cinnamon rolls made to look like intestines. The mummy dogs will have everyone laugh at how the googly eyes seem to stare right at you. The ghost rice krispie treats with pumpkin spice can be decorated to suit any occasion during the Holiday season.
Ingredients

Ready to make these spooky and delicious Halloween pretzels? With only 3 ingredients, you will be able to conjure up these witch fingers pretzels in no time. Your guests will be charmed by these creative “Hocus Pocus” treats.
- Pretzel rods
- Candy melts
- Sliced almonds
Keep reading down to the recipe card for all the specific ingredients and easy-to-follow instructions.
Instructions
Ready to transform an ordinary pretzel into spooky and creepy Halloween pretzels to share on a spooky night?
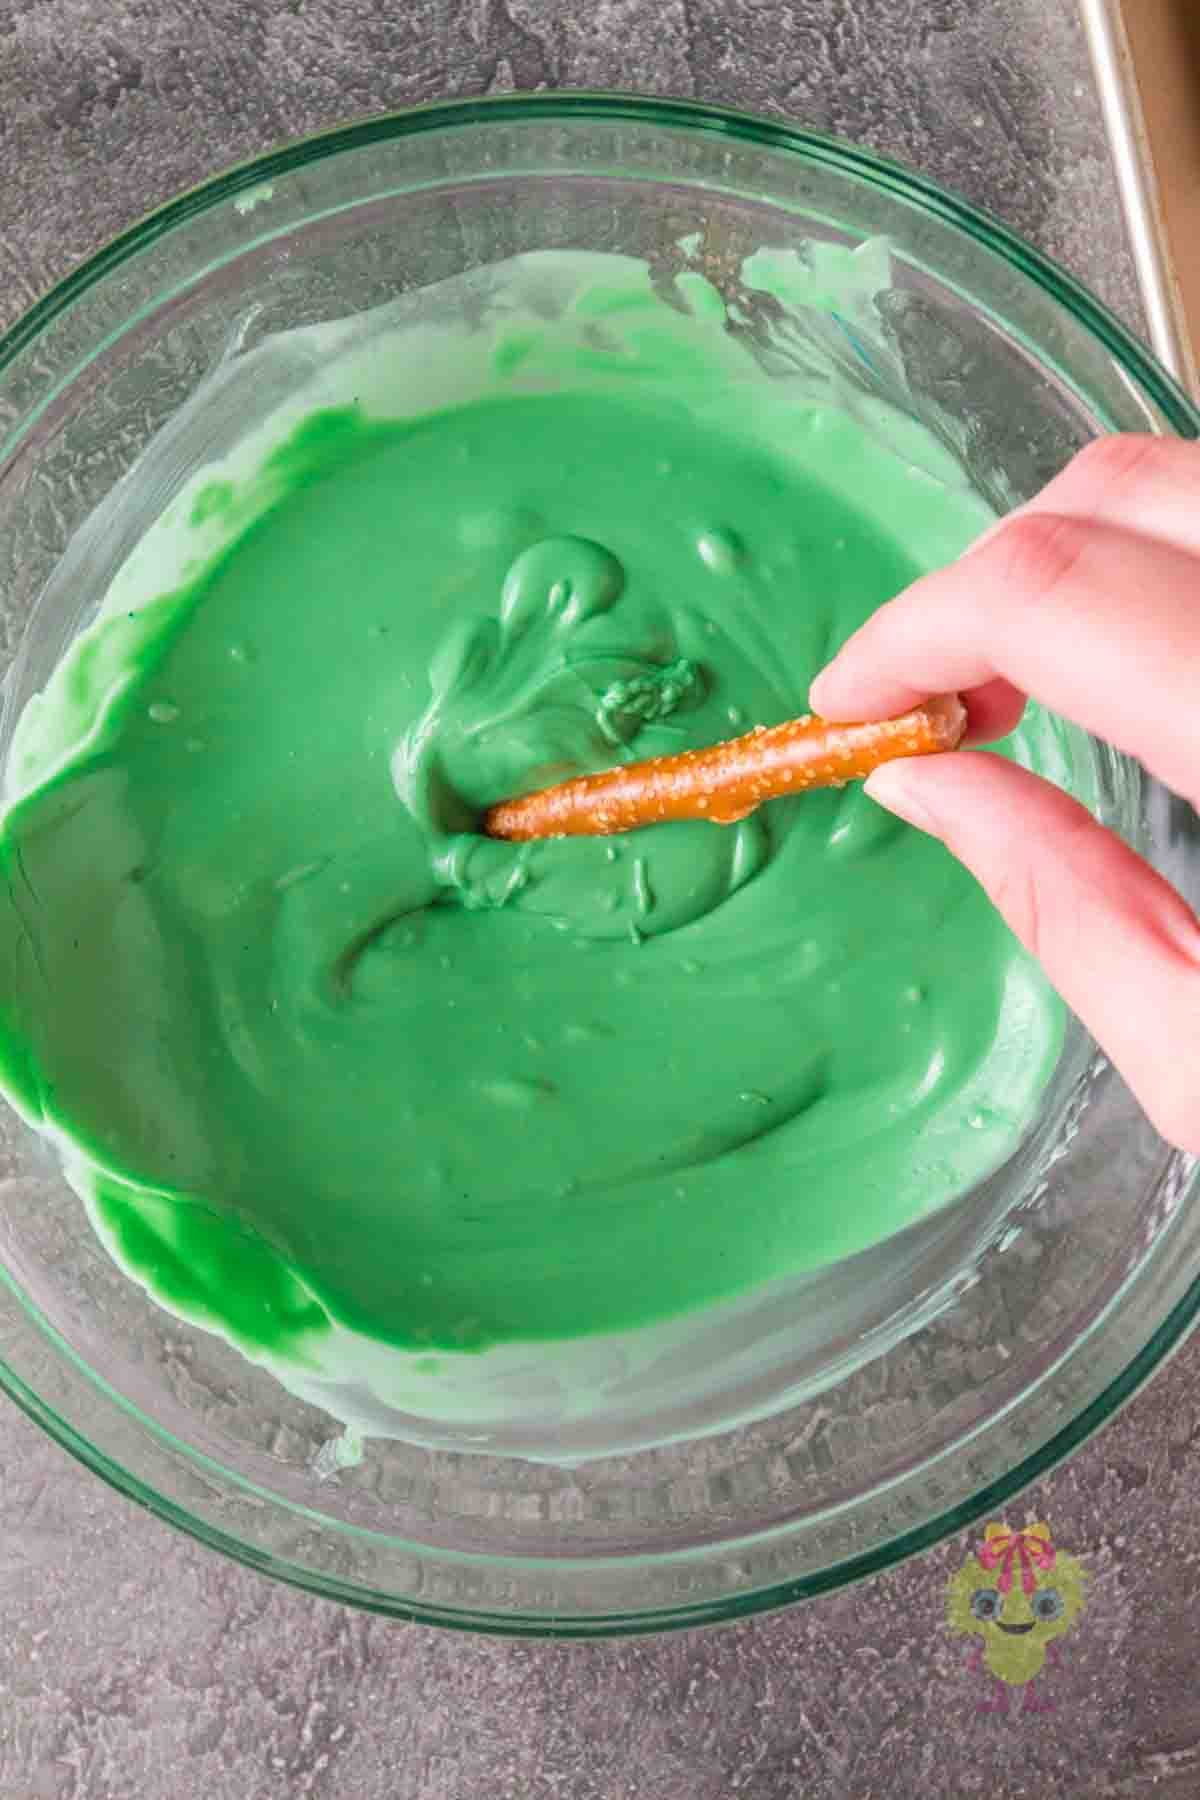
Coat the pretzels with melted chocolate.

Place almond slices to simulate the nail.
Serve and Enjoy!
Equipment
To make these Halloween pretzels you will need a few pieces of equipment. These will help make the whole process go as smoothly as possible. Here’s what you’ll need:
- Baking sheet: It is perfect to lay the coated Halloween pretzels on to set.
- Parchment paper: Line the baking sheet with parchment paper for easy cleanup.
- Microwave safe bowl or a bain marie (double boiler): Either is ideal for melting the candy melts without burning them.
- Heat-proof spoon or spatula: It will make it easier to mix the melted candy and to help shape the witch fingers pretzels.
Storage
Storage: They will last at room temperature in an airtight container for up to 2 weeks. We place some in the freezer for a fun, cold treat.
Top Tip
Once the Halloween pretzels are coated, you can place them on a cooling rack to have more air circulating around them. Just place the parchment paper under the rack so if there are any drips, it will be easier to clean up.


What do you think of these Halloween pretzels? Please leave us ⭐⭐⭐⭐⭐ in the review below and tag me @thekitchenbucketlist on Instagram, Facebook, Pinterest, and YouTube!
📖 Recipe
Halloween pretzels
Equipment
- baking sheet
- Parchment paper
- Microwave-safe mixing bowl or Bain-Marie (double boiler)
- Spoon or spatula
Ingredients
- 14 Pretzel rods
- 1 bag (12 ounces) candy melts, dark green
- 2 tablespoons oil
- 28 almond slices
Instructions
- Line a baking sheet with parchment paper. Set aside.
- Place 14 pretzel rods on the baking sheet cleanly broken in half. Set aside.
- In a microwave-safe bowl, add the candy melts and oil.
- Microwave in 15-second increments until the chocolate is melted and smooth. Mixing well in between each one.
- Dip one pretzel rod into the melted chocolate.
- Shake the excess chocolate and place it back on the cookie sheet.
- Add an almond slice to the coated side of the pretzel placing it to look like a nail.
- Cool until you have a mat finish, 30 minutes.
- Use a toothpick to create wrinkles where the knuckles would be.
- Cool until the chocolate coating is set.
- Serve and Enjoy!


Eva says
These are so cute. Bookmarking for Halloween!
Madhu says
These Halloween pretzels look so fun and festive! Saving this recipe to try for a spooky movie night with friends.
Misty Tannery says
These are so fun! Definitely making this year!
Courtney says
These were seriously so fun to make (and eat!). Definitely making these to snack on for Halloween!
Leanne says
These are spooky cool! I’m going to bookmark for my Halloween table! thanks for sharing
Risa says
I love these spooky, fun treats! Bookmarking these to make with my kids for Halloween, they will love them! I love that they look easy to make, too. Thanks for the fun idea!