
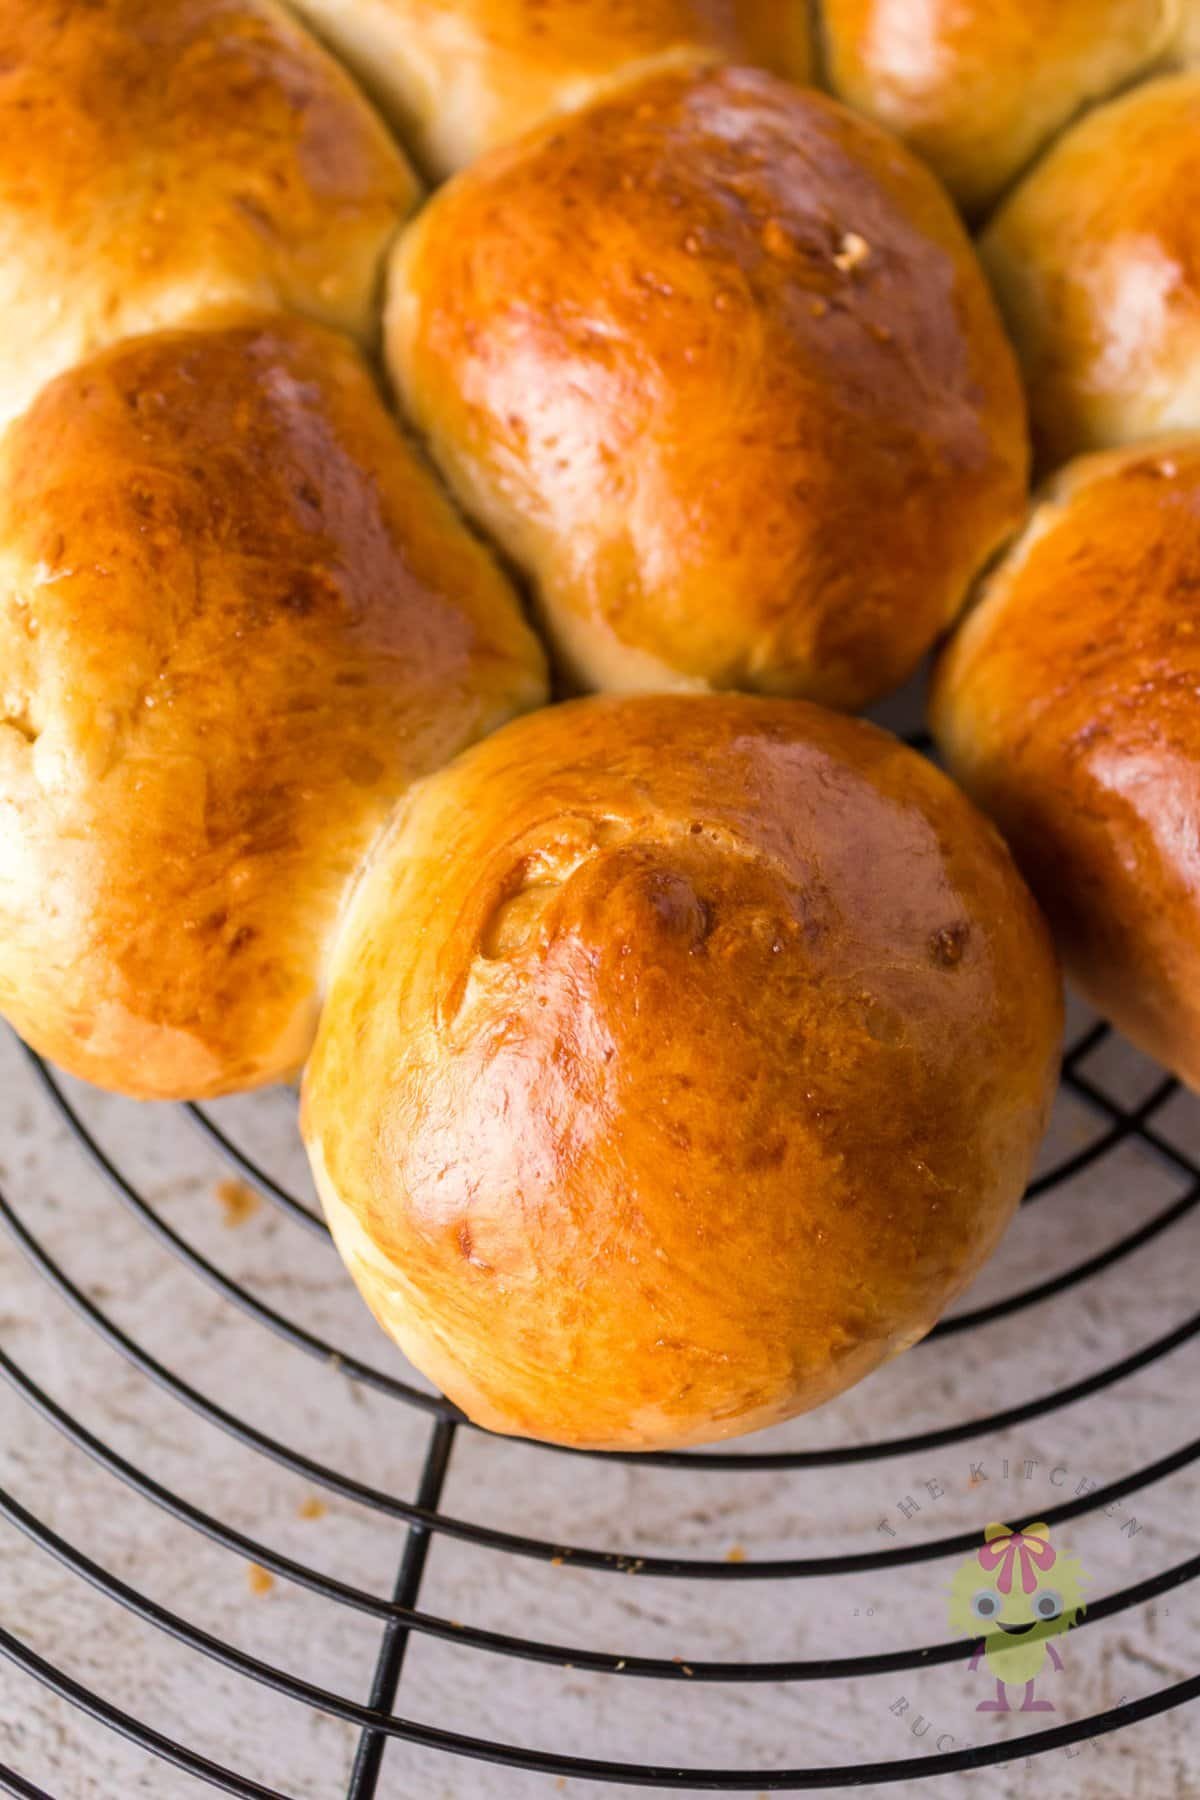
Warm and fresh Dinner Rolls right out of the Air Fryer. Imagine homemade rolls cooked in just over 10 minutes. Ready when you want them.

I’m a baker at heart and I love combining it with my air fryer. This recipe can have a batch of easy dinner rolls done so quickly. We all love those warm dinner rolls served when we’re out to dinner. Now you can enjoy the same thing at home. Imagine watching the butter melt on the freshly opened rolls for mealtime magic.
Jump to:
Making bread from scratch has never been so easy
No matter if you are a seasoned bread maker or if it is your first recipe, we all have to go through the same steps.
- Activate your yeast: check out the next section for more details.
- Mix all your ingredients until you have a dough ball.
- Kneading, if the recipe requires it. This is where you will knead the dough until smooth.
NOTE: Not all doughs need to be kneaded. - Rising. Transfer the dough to a bowl and let it rise in a warm, draft-free place. I find that my microwave is the best place.
- Punch the dough. This will allow the air bubbles to come out, and shape it to fit in your pan or free form.
- 2nd Rise. Cover the dough and let it rise for the 2nd time. The second time around is a lot shorter.
- Preheat your oven.
- Brush your bread with eggwash and score a few times. This is optional, depending on the style of bread.
- Cook in the preheated oven for the required time per directions.
- Let it cool. I know it is so tempting to cut it right away, but letting the bread sit for 10 or so minutes will allow the crumb (inside of the bread) to finish cooking.
- Now you can, serve and enjoy!

How to make sure your yeast works
Here is an easy checklist for you:
- When mixed with water at the right temperature with sugar, the yeast will foam up and get all puffy in around 4-5 minutes. If this is what you see, then your yeast is active, and have fun creating your bread.
- If it is not foaming then the yeast is not working properly. It will result in bread that has not fully risen, and we don’t want that.
- Always check the date on the yeast package.
- Store the yeast in an airtight container. I store mine in a mason jar in the fridge.
- Water warmer than 100 degrees F. will kill the yeast.
- Your water is too cold, which delays the yeast activation.
Ingredients
These ingredients are probably right in your cupboard. Go get them so you can have your own Fresh Dinner Rolls Tonight!

- Warm water (95-100 degrees F)
- Active dry yeast
- Cane sugar
- Olive oil
- Egg
- All-purpose unbleached flour
- Salt
Scroll down to the recipe card for quantities.
Tips and Tricks to a successful Homemade Bread
If you have never made, from-scratch dough, no worries. I will walk you through it step-by-step in the recipe card below. But first, let’s go over some information I wish I had known when I started making bread from scratch.
- Yeast: you can use an envelope or if you bake with yeast a lot you can buy it in bigger quantities. Just make sure to check the expiration date. If you are buying it in bulk, make sure to store it in an airtight container in the refrigerator.
- Flour: there are a lot of flours out there. The big debate is whether should I use bread flour or all-purpose flour. I have used both and both yielded an excellent final product. The bread flour will give you a more structured bread. The all-purpose flour makes for lighter and fluffier bread.


Mixing and Kneading
- Stand-Up mixer vs By hand: both have their pros and cons. But let’s stay positive. The stand-up mixer does all the mixing for you. Also, the best part is once your ingredients are all mixed, increase to medium speed for a few minutes. Though you may still need to hand-knead to finish it depending on the type of dough.
If you are making the bread by hand, it is simple. All you need is a mixing bowl and a mixing spoon or my absolute favorite a Danish dough whisk. You mix until the ingredients are all incorporated then knead the dough by hand until it is nice and smooth. Usually, the kneading takes anywhere between 8 to 12 minutes.
- Kneading: This is the process where you use your hands to knead the dough. You’re giving it a little massage. This process helps develop the gluten, which gives you the perfect chewy bite. You can knead by hand, great for sensitive doughs. Or, for a more robust dough use a standup especially for longer kneads.
- First rise: the first rise is important as all the ingredients are working to develop and get you the perfect bread. Covering your bowl and place in a warm draft-free place gives your dough the perfect conditions to develop into amazing bread. The microwave is my favorite place for the first rise.

Need more then 8 rolls … Easy just double the recipe.
Substitutions
The nice thing about this dough is how forgiving it is with substitutions and variations:
- Granulated sugar for cane sugar
- Vegetable oil for olive oil
- All-purpose flour for the all-purpose unbleached flour
Variations
- You can have some fun by adding some seasonings to this dinner roll. We will add Italian seasoning, freshly grated Parmigiano, or a pinch of red pepper flakes (this one is for the girls and Sean).
- Skip the egg wash before cooking for a softer crust.
- Make it special by brushing some butter and sprinkling some Parmigiano cheese after they are baked.
The Dinner Rolls are the perfect Sidekick to …

Smoked Chicken Drumsticks One of our go to “Low & Slows” with a simple-tasty rub. Every bite is tender, juicy, and the skin is light & crispy.

Smoked Sirloin Tip Roast This inexpensive roast marinated over night is meaty, tender, and juicy. Add the dinner rolls for meal time magic.

Smoked Pork Butt Tender, flavorful, and easier than you can imagine to cook. You can have these rolls done while the pork is resting … Can you taste the sliders you could make? Yum.

San Sebastian Cheesecake. You have made homemade dinner rolls, so you can do this too. Silky and smooth with no crust, make it the day before for dessert.
Equipment
- Air Fryer
- Clear mixing bowls
- Danish dough hook (Optional)
Storage
Leftovers can be kept in an air-tight container for 3 to 4 days. If you are in a warm environment like me, I would suggest storing them in the fridge. To warm them up, place them back in the air fryer.
Now you have homemade rolls that you can enjoy. Have them as a snack with butter, sweet butter (honey butter is excellent), or jam. They also are perfect for an egg sandwich, sliders, or on a charcuterie board.

How fun was that to make rolls from-scratch? What did you eat with the rolls?
Tell us below.
📖 Recipe

Dinner Rolls in the Air Fryer
Equipment
- Air Fryer
- Mixing Bowls
- Danish Dough Hook (Optional)
Ingredients
- ¾ cup warm water
- 1 tablespoon active dry yeast
- 2 tablespoons cane sugar
- 2 tablespoons olive oil
- 1 egg
- 2 ¼ cups all-purpose unbleached flour
- ½ teaspoon salt
Instructions
- In a mixing bowl, combine warm water, yeast, and granulated sugar. Mix slightly and let it sit until the yeast activates.
- Once the yeast is activated, it will foam (in about 4-5 minutes), add the oil and the egg. Mix to combine.
- Add the flour and the salt.
- Mix until the flour is incorporated.NOTE: For this recipe, I used a Danish dough whisk to show that this recipe is accessible to everyone. You can make it with a Danish dough whisk or wooden spatula (I wouldn’t recommend using a regular whisk as the dough gets trapped in the middle), or you can use a stand-up mixer.
- When mixing with a whisk or spatula you can mix until the flour is all incorporated or you can use your hands to finish incorporating the flour into the dough. I would recommend using the whisk until almost all the flour is incorporated and finished with your hands.
- Once you have a nice dough ball, place the dough into an oiled bowl, cover it with plastic wrap and let it rise for 1 hour or until the dough has doubled.
- Put the dough on a working surface and cut it into 7-8 pieces (If you have a scale they are approximately 3 oz. each).
- Line your air fryer basket with parchment paper.
- Place your rolls on the parchment paper.
- In a small bowl, whisk an egg and 1 tablespoon of water.
- Using a pastry brush, gently brush the eggwash on the rolls.
- Air Fry on a manual setting at 320 degrees F. for 10-11 minutes or until the internal temperature has reached 190 degrees F.
- Take the rolls out of the air fryer and place them on a cooling rack.NOTE: 5-10 minutes.
- Enjoy your warm and fresh dinner rolls!


Abi says
Made these Air Fryer Dinner Rolls tonight, fluffy inside, perfectly golden outside! Love how fast they bake!Definitely making again for weeknights and holidays!
Leanne says
These rolls turned out great and were easy to make!